Candles can be verrry expensive unless you can find them somewhere cheap like Ross or T.J.Maxx. I've even seen some soy candles that are up to $70!!! First of all, if you're buying soy candles for that much, you 1) have too much money, or 2) have a very soyrious problem.
But don't throw away the bottom leftovers of your candle! When the wick burns down to the last of its hours, you are usually stuck with an ample amount of wax that would be ashame to throw away, right? I collected my leftover wax as each candle bid farewell. I was able to make 7 decent sized candles...and the best part was that I spent less than $3 for them all. Here's how:
1. The wick and wick holder
If you are able to salvage the wick holder, do so. I believe that I was able to keep half of the wick holders for my candles. These are the little metal parts that hold in the wick. But if you don't have any wick holders, this doesn't mean you need to run out and buy them. If you are a perfectionist, then go right ahead and do so. Though I imagine when the wax starts to melt closer to the bottom of the candle, that the wick may get wiggly and either move or fall over into the melted wax. Your call though! I have yet to experience that...
 As for wick part, you will have to go out and buy a strand of candle wick. When searching, try to buy unbleached kind, as this is a healthier option. Depending on your hardcoreness of DIYing, there are some differnt options for these wicks. There are wicks that are already waxed, wicks that are waxed and have the wick holder attached already and (what I got) wicks that are bare, meaning they have no wax or holder. I show you how to wax and insert the holder in this blog post. But you can skip that part if you opt for the wick thats all done for you. The way I see it, you will eventually have to cut down that long wick in the package, so you're stuck with a lot of extremely short pieces that you might have to discard. With the wick only package, you can cut the length that you need and prevent wasting.
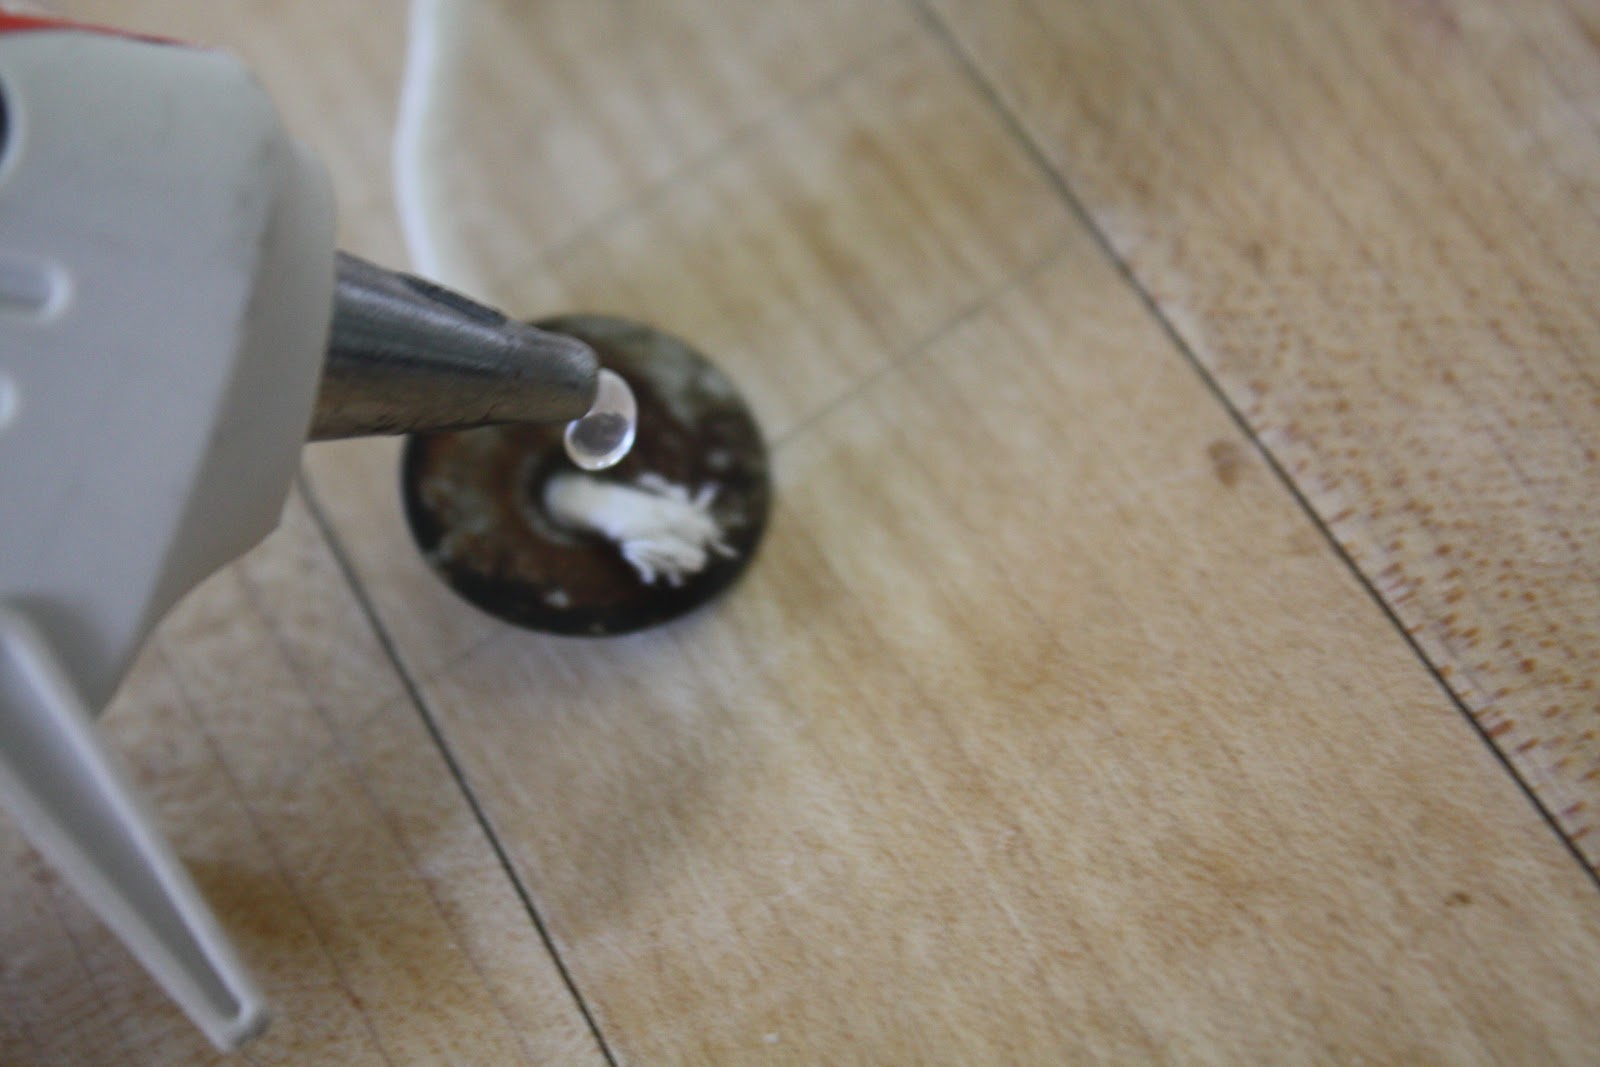
2. Inserting the wick with the holder. (skip this section if you bought the premade wick/wickholder)
The tricky part is to get the wick into the holder. I used plyers to squeeze them back into a circle shape if need be. Once you have it in the holder, hot glue the bottom part. Let it dry.
3. Prepping the Wax
 Gather all your wax. You will most likely have a hard time getting it out of the container, so put the candle in the freezer for about 10-20 minutes. Take it out and you'll be able to pop the whole chunk out of it by wiggling the wax around from side to side. Next, separate you waxes into two different piles depending on what kind of candle it is. For me, I first separated it by wax. I had a soy wax so I put that in one pile and then I put the parrafin (most candles) wax in another. I had some blue wax and yellow/white wax in the parrafin pile, so I separated that down into separate piles. You will be melting your waxes by types and then by colors if you want to keep the same color candle.
Next, cut up the wax into small pieces (1/2 - 1 inch chunks).
4. Melting the Wax
Make a double broiler by placing water in a pot and then using a stovetop safe glass or stainless steel jar/bowl. I put one of those ring tops of a mason jar in the middle of the pot, so my glass container could be steady and centered. This is not necessary though. Put the heat on medium to medium-low and place the wax into your melting container. I use a large glass measuring cup since it has a pour spout that will be easy to transfer to the candle containers. Make sure you have a large enough pot so the water doesn't spill over, like mine. The water line should go at least a third of the way up the wax to it can melt efficiently.


5. Waxing the wick
If you have purchased wicks already pre-waxed, then you're golden. Skip down to the next paragraph. If not, then keep reading. This step you have to kind of do in unisync with the melting step. But ultimately, with protective, heatproof gloves, you will simply dip the wick into the melted wax, and lay it flat to dry. I find the best way is to hang it is upside down in the freezer for a few minutes. This way you have a straight wick when the wax hardens. Or you can just lay it straight on the table.
Once the wick is dry, hot glue the metal end of the wick to the bottom of your cleaned out candle.

6. Prep the Jar for Pouring


So with all the wax I saved up, that I probably would have just chucked in the past along with the beautiful jars, I was able to make 7 decent sized candles! Talk about savings! Start saving that wax of yours and store it in a container in a cool, dry and dark spot! Your wallet will be glad you did :)


But don't throw away the bottom leftovers of your candle! When the wick burns down to the last of its hours, you are usually stuck with an ample amount of wax that would be ashame to throw away, right? I collected my leftover wax as each candle bid farewell. I was able to make 7 decent sized candles...and the best part was that I spent less than $3 for them all. Here's how:
1. The wick and wick holder
If you are able to salvage the wick holder, do so. I believe that I was able to keep half of the wick holders for my candles. These are the little metal parts that hold in the wick. But if you don't have any wick holders, this doesn't mean you need to run out and buy them. If you are a perfectionist, then go right ahead and do so. Though I imagine when the wax starts to melt closer to the bottom of the candle, that the wick may get wiggly and either move or fall over into the melted wax. Your call though! I have yet to experience that...

2. Inserting the wick with the holder. (skip this section if you bought the premade wick/wickholder)
The tricky part is to get the wick into the holder. I used plyers to squeeze them back into a circle shape if need be. Once you have it in the holder, hot glue the bottom part. Let it dry.
3. Prepping the Wax
 Gather all your wax. You will most likely have a hard time getting it out of the container, so put the candle in the freezer for about 10-20 minutes. Take it out and you'll be able to pop the whole chunk out of it by wiggling the wax around from side to side. Next, separate you waxes into two different piles depending on what kind of candle it is. For me, I first separated it by wax. I had a soy wax so I put that in one pile and then I put the parrafin (most candles) wax in another. I had some blue wax and yellow/white wax in the parrafin pile, so I separated that down into separate piles. You will be melting your waxes by types and then by colors if you want to keep the same color candle.
Next, cut up the wax into small pieces (1/2 - 1 inch chunks).
4. Melting the Wax
Make a double broiler by placing water in a pot and then using a stovetop safe glass or stainless steel jar/bowl. I put one of those ring tops of a mason jar in the middle of the pot, so my glass container could be steady and centered. This is not necessary though. Put the heat on medium to medium-low and place the wax into your melting container. I use a large glass measuring cup since it has a pour spout that will be easy to transfer to the candle containers. Make sure you have a large enough pot so the water doesn't spill over, like mine. The water line should go at least a third of the way up the wax to it can melt efficiently.


5. Waxing the wick
If you have purchased wicks already pre-waxed, then you're golden. Skip down to the next paragraph. If not, then keep reading. This step you have to kind of do in unisync with the melting step. But ultimately, with protective, heatproof gloves, you will simply dip the wick into the melted wax, and lay it flat to dry. I find the best way is to hang it is upside down in the freezer for a few minutes. This way you have a straight wick when the wax hardens. Or you can just lay it straight on the table.
Once the wick is dry, hot glue the metal end of the wick to the bottom of your cleaned out candle.

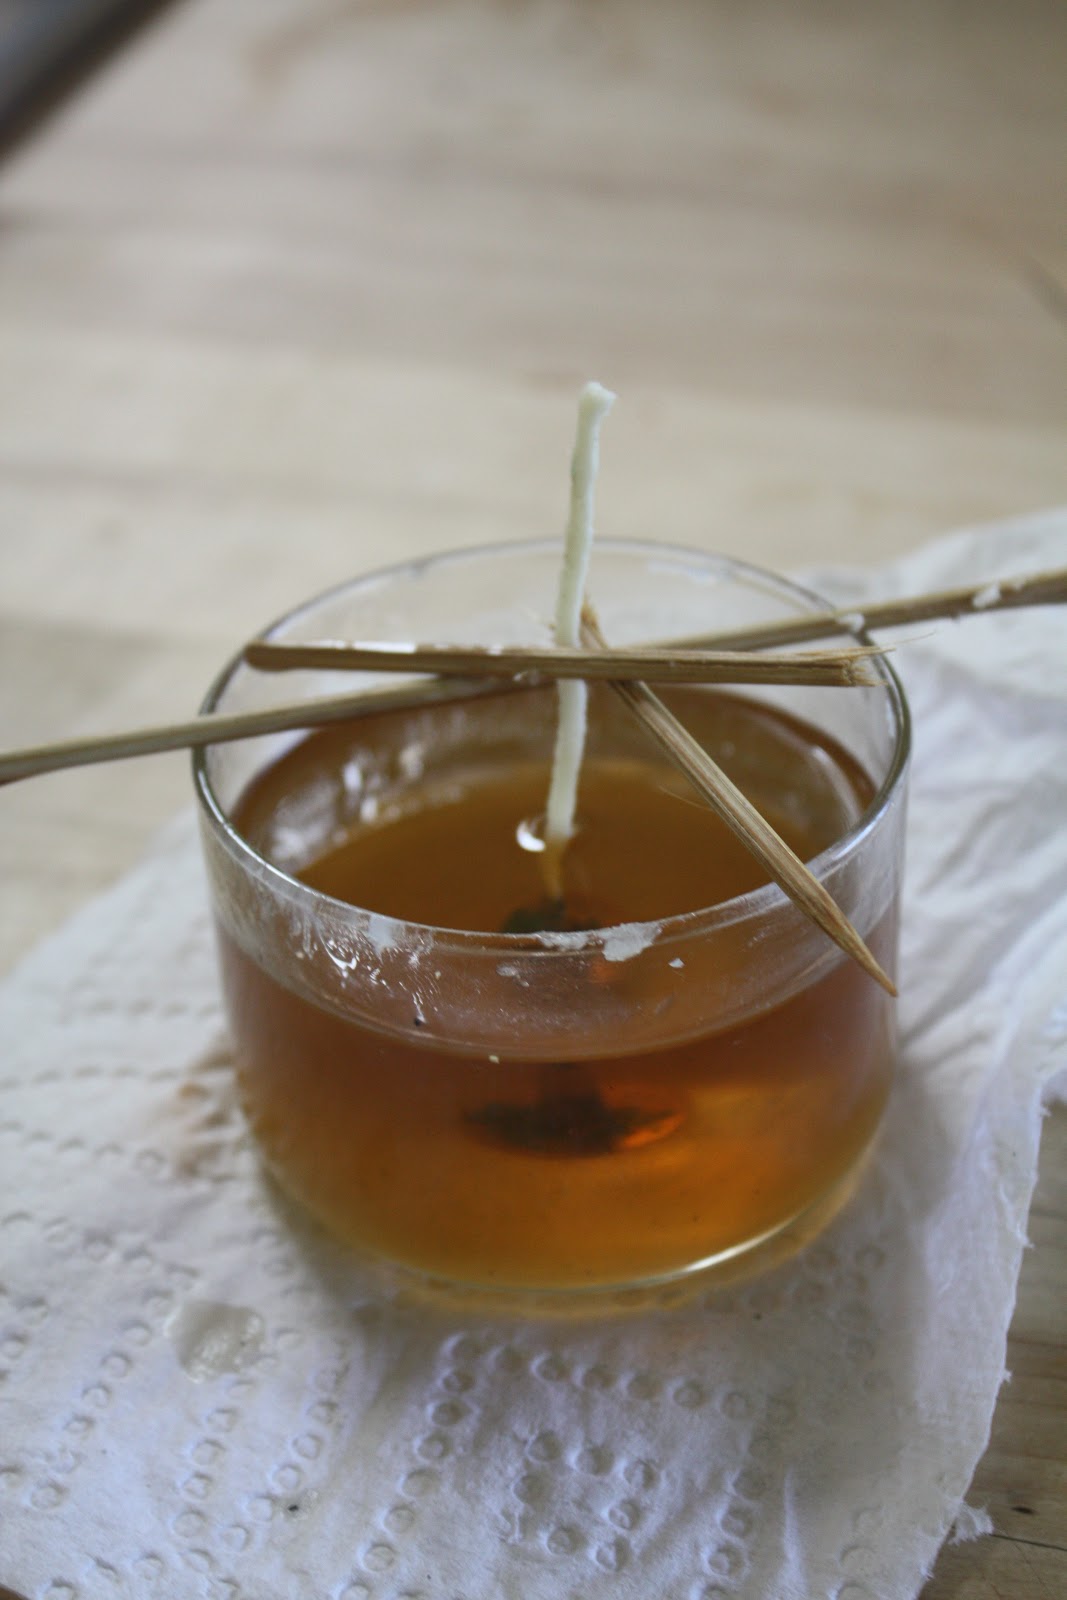
As seen in the picture above, I used wooden bbq sticks to hold the wick up. It will prevent making a mess and having the wick possibly fall over if the wax on the wick isn't hard enough. You can use any type of think stick material to make a cross on top of the jar.
My favorite step! The pouring! Pour wit mitts on to keep your skin safe. Pour into each jar and leave about a 1/2 inch or more free from the top. To make sure your wick stays extra taught, you can wrap or tie the wick around the stick like the second picture below.

6. Adding Scents
Wait a few minutes for the wax to cool a little, then add anywhere up to 20 drops per essential oil scent to your melted wax. Stir gently with a wooden stick like above, avoiding touching the wick in place.

7. Hardening & Results!
You
can place these in your refrigerator or freezer for faster hardening
time, or simply leave on your counter. I placed mine in the refrigerator
and it took no more than about 20 minutes. Depending on what hardening
method you use, wait a few hours after you think it's hardened to light
up, just in case. Make sure you remember to cut the wick down to a
normal length of about an inch.So with all the wax I saved up, that I probably would have just chucked in the past along with the beautiful jars, I was able to make 7 decent sized candles! Talk about savings! Start saving that wax of yours and store it in a container in a cool, dry and dark spot! Your wallet will be glad you did :)


No comments:
Post a Comment